

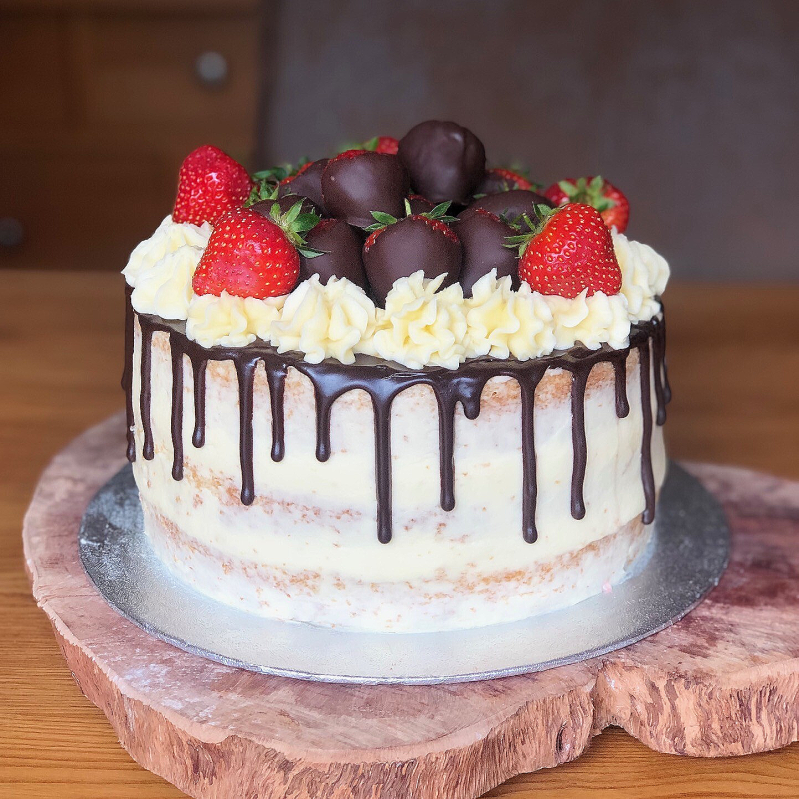
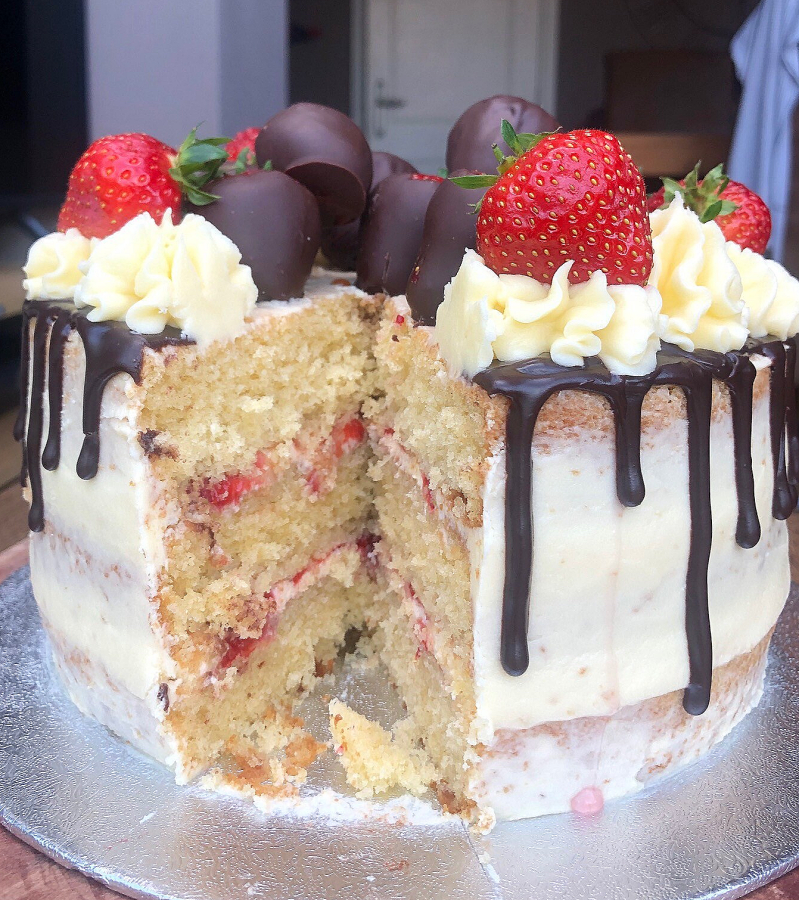
A Victoria Sponge as the base for a celebration cake. Fresh cream, jam and strawberries sandwiched between three super light vanilla cake layers. Decorated with vanilla buttercream and a chocolate ganache drip, topped with chocolate covered strawberries.
This Victoria Sponge has three layers of a super light & fluffy sponge, sandwiched together with layers of strawberry jam, whipped cream, and slices of fresh strawberries. A vanilla buttercream is used to create the 'naked cake' look, with a drip of dark chocolate ganache. The cake is topped with some piped vanilla buttercream, and a collection of chocolate covered strawberries piled in the centre.


I made this cake for my Dad's 50th birthday - he did just want a classic Victoria Sponge, but I couldn't miss the opportunity to practice my decorating skills! I haven't created many decorated cakes - so in no way am I claiming this is perfect - but I did use all my own recipes & wanted to share it with you because the outcome was delicious!!! This recipe introduces some basic cake decorating skills, so it's a brilliant place to start if you're wanting to practice some cake decoration of your own.
This recipe has quite a few different elements. Personally, I think they all compliment each other and work incredibly together - dark chocolate, sweet buttercream & sharp strawberries. However, this recipe can be adapted to create your perfect cake! You don't have to include every element that I have - you could stop after the cakes are filled & layered to create a classic Victoria Sponge - just decorate with some fresh strawberries and a dusting of icing sugar. If you still wanted to practice your cake decoration skills, but didn't want to include all of the elements, scrap the chocolate and decorate your naked cake with piped buttercream and fresh strawberries. There is so many possibilities for this cake, so think outside the box and re-create this recipe in any way you like - please don't forget to send me pictures if you have a go!
RECIPE
Ingredients:
This recipe will make a 3 layer cake (12-14 slices).
For the cake:
- 340g unsalted butter
- 340g caster sugar
- 5 eggs
- 2tsp vanilla extract
- 340g self raising flour
- 2tsp baking powder
- 1tbsp milk

For the buttercream:
- 200g unsalted butter
- 400g icing sugar
- 2 tsp vanilla extract
- 1tbsp double cream
- salt (to taste)

For the filling:
- 250ml double cream
- strawberry jam
- fresh strawberries
For the chocolate drip:
- 50g dark chocolate
- 50ml double cream
For the chocolate covered strawberries:
- fresh strawberries
- 100g dark chocolate
- 1tbsp sunflower oil
You will need:
- stand mixer / electric hand whisk
- 3 x 8" round cake tins
- piping bag fitted with a large star nozzle
- cake board
- pallet knife
- cake scraper
Method:
For the cake:
- Prepare all your ingredients.
- Grease your 3 cake tins and line the base of each one with baking paper. For a super even bake, check out my tips & tricks section.
- Preheat your oven to 190°C/170°C.
- In the bowl of a stand mixer fitted with the paddle attachment, or with an electric hand whisk, beat the butter and sugar together for 3-4 minutes until light and fluffy.
- Add the eggs one at a time, making sure to mix well in between each addition.
- Add the vanilla extract and mix to combine.
- In a separate bowl, mix together the flour and baking powder. Add 1/3 of this into the cake mixture and mix just to combine. Add another 1/3 and do the same. Before adding the last of the flour, add the splash of milk. Mix in the last bit of flour, using a spatula to scrape down the sides of the bowl to ensure all the ingredients are incorporated.
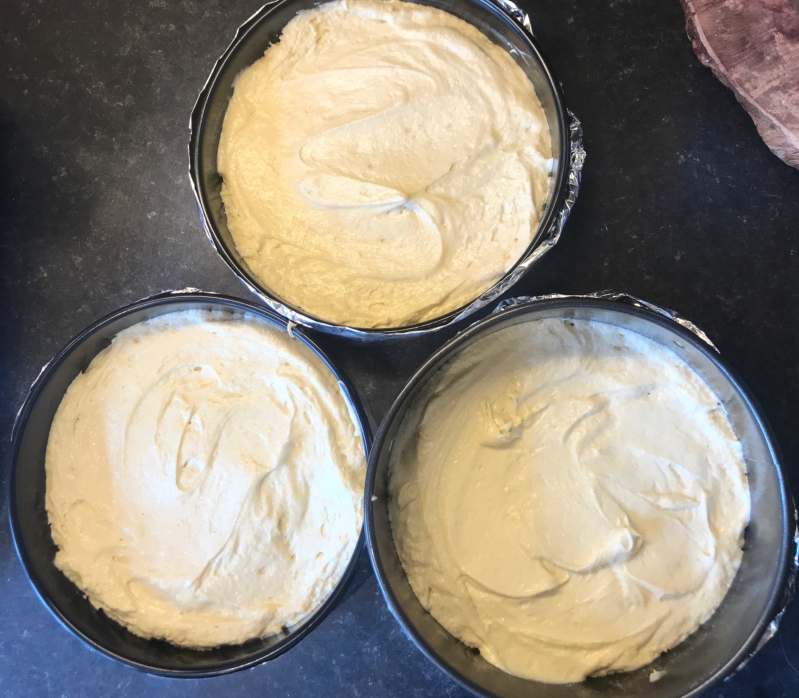
- Distribute the cake batter evenly between your 3 prepared tins - for even cake layers you can weigh out the batter. Smooth out the tops and place in the preheated oven for 25-30 minutes.
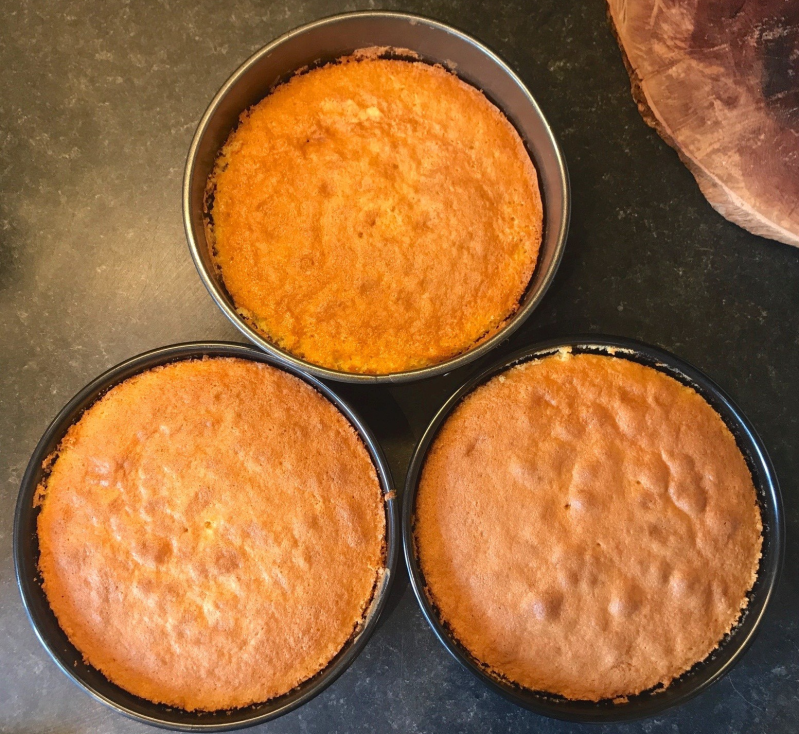
- Check the cakes are baked by inserting a skewer into the middle of the sponge. If it comes out clean, the cake is baked, if not, place them back in the oven for 2-5 minutes.
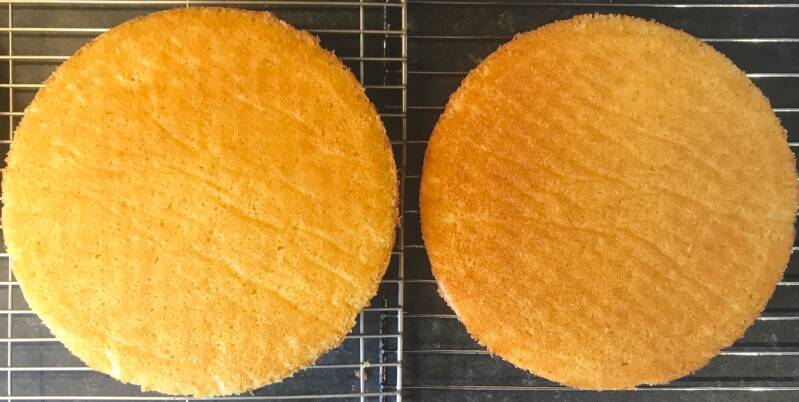
- Leave to cool in their tins for 20 minutes before turning out onto a cooling rack for a further 20 minutes.
- Once the cakes are almost completely cool, stack the cakes one on top of the other with a sheet of baking paper in between each one (see step-by-step photos). Cover with cling film and place in the fridge whilst you prepare the decoration. This will allow the cakes to firm up before assembling (this makes the job much easier!).


For the buttercream:
- Whilst your cakes are chilling in the fridge, mix up your buttercream.
- In the bowl of a stand mixer fitted with the paddle attachment, or using an electric hand whisk, beat the butter until smooth and pale.
- Add the icing sugar a little at a time - you may have to scrape down the bowl between additions.
- Add the cream and vanilla extract and mix until combined. Add salt to taste - this isn't a must, but it helps to balance out the sweetness.
- Mix on high for a further 3-4 minutes (this will give you a perfectly smooth buttercream!).
- Using a spatula or wooden spoon, spread the buttercream up the sides of the bowl to push out all the air bubbles.
- Once the buttercream is completely smooth, cover with cling film and place in the fridge.


For the chocolate covered strawberries:
- Melt the dark chocolate in the microwave. Heat for 30 seconds at a time and stir in between until smooth. Add the sunflower oil and mix well.
- Hold your strawberries by the stalk and dunk them into the chocolate mix. Take the strawberry out and allow some of the excess chocolate to drip off before placing on a baking tray with a sheet of baking paper.
- Once all the strawberries are done, place the tray in a cool spot to set.

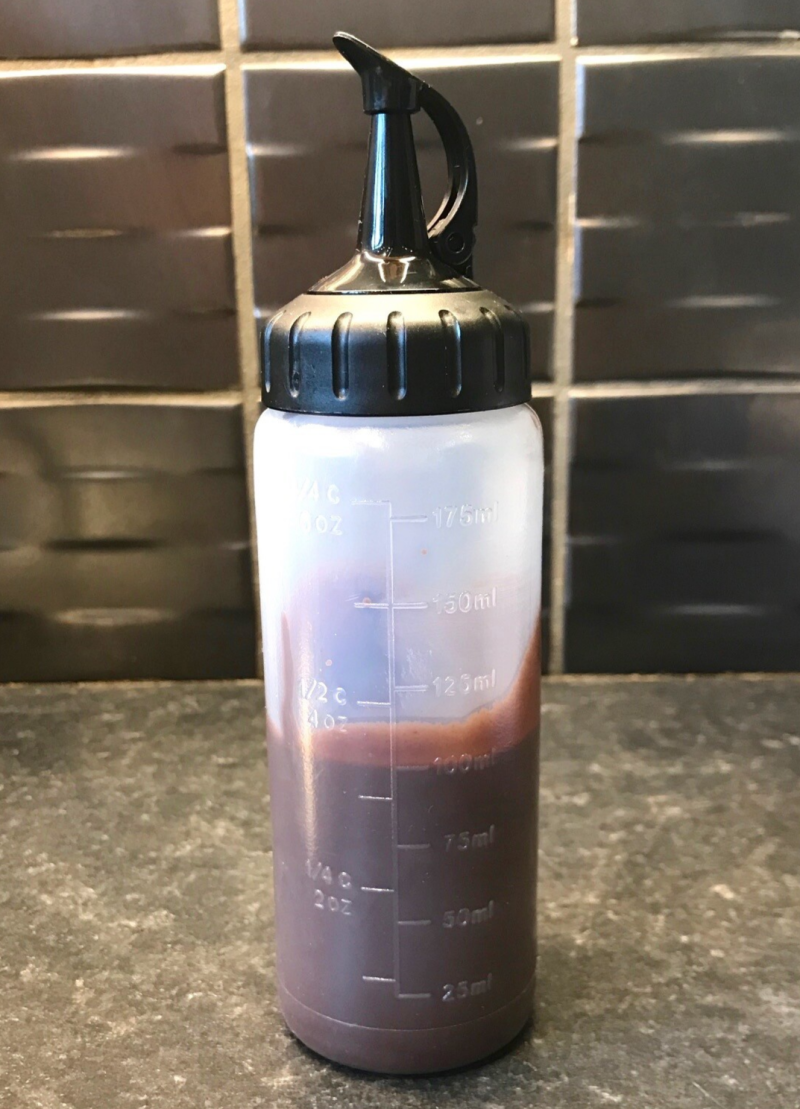
For the chocolate drip:
- Melt the cream in the microwave.
- Stir in the dark chocolate until smooth and shiny.
- Pour into a squeezy bottle, or if you don't have one, cover with cling film and place in the fridge to set a little.
For the filling:
- Slice some strawberries.
- Pour 250ml of cream into a bowl whip up using an electric hand whisk until thickened. Go slowly, when you think it's almost there - stop - you don't want to over-whip!

To assemble the cake:
- Place the first layer of your cake into the centre of a cake board.
- Spread on a layer of either shop-bought, or homemade strawberry jam.
- On top of that, spread a layer of the whipped cream.
- Place a layer of sliced strawberries on top of the cream.
- Add the second cake layer and repeat steps 2-4.
- Add the final cake layer, making sure it's centred.
- At this stage, if you are using a turntable, place the cake on there now.
- Remove your buttercream from the fridge. If it's a little stiff, add a dash of cream and whip up again to loosen.
- Transfer 1/4 of the buttercream to a piping bag fitted with a large star nozzle and set aside.
- With the remaining buttercream, use a pallet knife to dollop the buttercream onto the top & sides of the cake.
- Spread the buttercream all over the surface of the cake.
- Place the cake scraper towards the side of the cake and begin turning you cake away from you, whilst scraping towards you to smooth out the buttercream.
- After each scrape, get rid of the excess into a separate bowl (you can still use this). We're making a naked cake, so it doesn't have to be perfect - the idea is to have the cake layers peeping through a thin layer of buttercream.
- Keep scraping until the cake layers are beginning to show and the sides are smooth & straight. You can use the excess buttercream to fill any gaps - just make sure to smooth out every time.
- Scrape the excess off the top of the cake and ensure the edges are crisp.
- When your almost happy with it - stop! If your a perfectionist like me, you could keep going forever and pick out every flaw, but the reality is it'll probably end up looking worse!
- Take your chocolate drip out of the fridge. Test the consistency by dripping it down the side of a bowl. If its a little stiff, leave it to loosen up a little before using.
- Once your happy with the consistency, start dripping! If your using a squeezy bottle, apply varying amounts of pressure for each drip - so you get some short, some long. If you don't have a squeezy bottle, spoon varying amounts of ganache to the edge of the cake and allow to drip down the sides.
- Using the buttercream in your piping bag, pipe around the edge of the top of your cake. Apply pressure to pipe the buttercream on, and release pressure as you lift the piping bag away.
- Use some fresh strawberries, and the chocolate covered strawberries you prepared earlier to decorate the cake. I placed them in the centre of the cake but you can decorate it however you like.


Tips & Tricks
Baking the sponge:
- A little hack I got from @auntycakesbakes (thank you!) - DIY cake tin wraps. The purpose of these is to give you an even bake with a good rise, resulting in perfectly flat cake layers. No trimming of the cake layers is needed, so you also avoid wasting scraps of cake. All you need to do this is foil and kitchen towel. Cut a thick strip of foil long enough to wrap around the sides of your cake tin. Wet some kitchen towel & ring it out so it's damp. Wrap the foil around the kitchen towel and wrap around your cake tin. Make sure you attach the two ends together & there you go! It gives you a perfect bake!
- Don't open the oven before the 25 minute mark, this will risk the cakes sinking in the centre.
Chilling the sponge:
- If you're decorating a sponge, always make sure to chill it in the fridge. It firms it up making it much easier to work with.
- Stack the cake layers one on top of the other with a sheet of baking paper in between each one. This takes up less fridge space, and makes it easier to transport to & from the fridge.
Tips for assembling the cake:
- Use a dollop of buttercream on your cake board before placing the first cake layer on. This will help the cake stick to the cake board - this will be really helpful when coating the cake with buttercream.
- When you fill each layer, try to keep the filling & cake layers level to avoid having to trim the cake once assembled.
- If your cake layers aren't as level as you'd like, use the fresh strawberry slices to even it out - no one likes a wonky cake!
Making the buttercream:
- Make sure once all the ingredients are incorporated that you continue to beat the buttercream for a further 3-4 minutes. Once you push all the air bubbles out, you will be left with a super smooth buttercream. This makes it much easier for coating & decorating the cake.
- When you fill your piping bag, fold the wider end over your hand whilst you spoon the buttercream in (see step-by-step photos). Once the piping bag is filled, twist from the top to push the buttercream towards the nozzle. Then you're ready to pipe!
Decorating the cake:
- Apply more buttercream than you think you need before scraping. This will make for a cleaner coat. The beauty of a naked cake, however, is that it doesn't have to be perfect. You can have as much or as little of the cake layers showing as you like.
- Whenever you scrape around the cake, scrape the excess into a bowl. You can and will use this again. Crumbs are ok, so don't worry about those either!
- It's important that the ganache for the chocolate drip has had time to chill before use, if not, it will just melt the buttercream.
- Checking the consistency of the ganache is important. Use the side of a bowl to mimic your cake and test the speed & thickness of your drip. If it's a little too stiff, leave it to loosen up a bit before use. When you're happy, go ahead and drip!
- A squeezy bottle makes drip cakes - well - a piece of cake! I would highly recommend buying one - scroll up to find a link to the one I use.
If anyone is struggling with measurements, check out my conversion charts - these are really handy for any recipe, so save or print them so you have them to hand for any tasty treat you bake.
Thank you so much for reading and I hope some of you try out this recipe for yourself. If you do, please let me know how it went & if you changed anything - and of course, how it tastes! Don't forget to send over a picture of the finished product, i'd love to see! If you love this recipe, be sure to share it with your family and friends so they can try it out too.
Please leave a rating below and feel free to leave any questions and i'll get back to you. Suggestions are also welcome! Let me know if this recipe was easy to follow, and anything else you might like a recipe for.
Until next time,
Abby x

Add comment
Comments