

The recipe for my go-to triple chocolate brownies! Super rich, super soft and super chocolate-y; what more could you ask for?

Who doesn't love a brownie??? It's the best treat when you're just craving something sweet - so follow this recipe and you'll be able to whip them up in less than an hour! This is the recipe I always use for my brownies - a staple for most bakers is a basic brownie recipe, so feel free to use this as yours. They're rich, moist and not too sickly - they even taste just as good 3 days after baking them.

This recipe can be used as your basic brownie recipe. Once you've mastered the technique, achieving a soft & light texture with that crackling, shiny top, you can get creative and add some extras. After all, my main aim is to make all my recipes adaptable so that everyone can have a go!
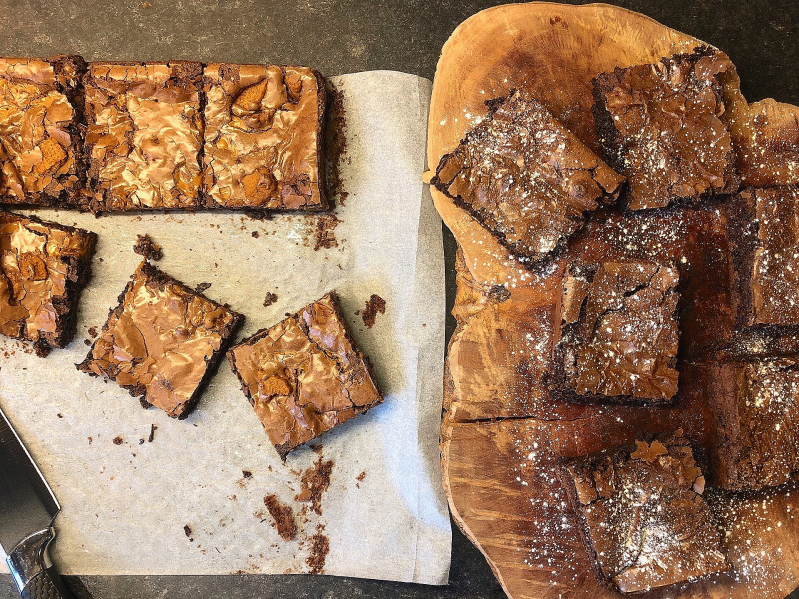
I decided to make some half & half brownies. I added some Biscoff biscuits & spread to one half of my brownie mix (see method) and kept the other half as classic brownies. I thought I was on to a winner with this idea, but it didn't work out how I'd hoped. The brownies are so rich that the Biscoff flavour just became lost, although the biscuits did add a nice crunch. I wouldn't do this again using this brownie mix, but maybe with a less rich flavour it would work better. I think the Biscoff flavour would work perfectly in a blondie. This is definitely something i'll be trying - putting the flavour in the mix, as well as some spread swirled through, and some biscuits on top - you know, getting all that Biscoff goodness! Let me know if this is something you would like a recipe for.
The crunch of the biscuits did add a nice texture, although I think a plain biscuit would be a better addition. Maybe add some digestives & marshmallows and make it a s'mores brownie - yum!
If you want another layer of texture & flavour, add some fruit to your brownies. You could substitute the milk choc chips for some rasberries - they go lovely with white chocolate. Or get rid of both milk & white choc chips and make some cherry & chocolate brownies. The possibilities are endless.
RECIPE
Ingredients:
This recipe makes 12 brownies.
- 185g unsalted butter
- 185g dark chocolate
- 3 eggs
- 275g caster sugar
- 95g plain flour
- 35g cocoa powder
- 1/2tsp baking powder
- 50g white chocolate (cut into chunks)
- 50g milk chocolate (cut into chunks)


(optional extras):
- Biscoff biscuits
- Biscoff spread
- Digestive biscuits
- Marshmallows
- Fruit

You will need:
- stand mixer/electric hand whisk
- spatula
- deep 8"x12" baking tin
- baking paper
- cooling rack
Method:
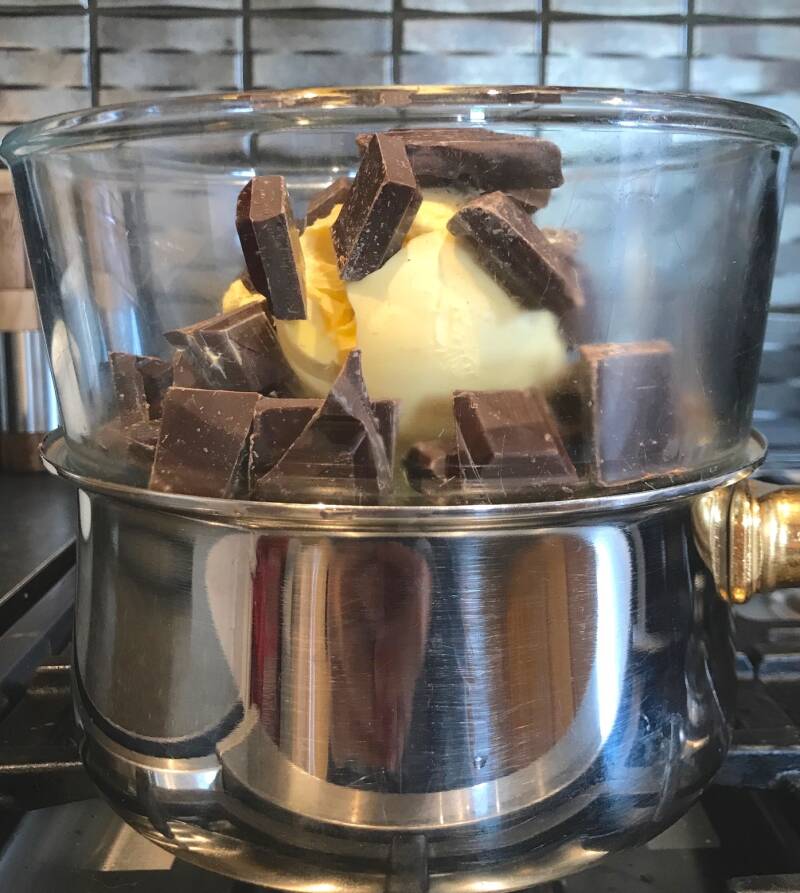
- Cut the dark chocolate and butter into chunks and place in a glass bowl together. Half-fill a saucepan with water and put it on the hob. Place the glass bowl on top of your saucepan - make sure the bottom of the bowl doesn't come in contact with the water (you want the steam to melt the chocolate & butter). Slowly melt the chocolate and butter together (on low), stirring every so often. This may take a while, but patience is key - you don't want it to burn!
- Once the chocolate & butter mix is fully melted, take it off the hob and leave to cool.
- Preheat your oven to 180C/160C Fan and prepare your tin. I grease the whole tin, and then place a long sheet of baking paper along the bottom and 2 of the sides (this is handy for lifting the brownies out of the tin once baked).
- In a stand mixer fitted with the whisk attachment, or using an electric hand whisk, whisk the eggs and sugar together for around 5 minutes until you have a mousse-like consistency. To test if it's ready, pick the whisk up out of the bowl and let the mixture drop off - if it leaves a trail - it's ready!
- Pour the cooled chocolate & butter mix into the egg mix and using a spatula, fold in slowly to combine (you don't want to knock out all the air that's just been whisked in).
- When you think you're almost there, stop mixing - you should have a marble-like pattern (see step-by-step photos).
- Mix all dry ingredients together in a separate bowl, and then sift into your brownie mixture.
- Using the same folding technique, incorporate the flour into the mixture. Again, when you think you're almost there, stop - you don't want to over-mix.
- Fold in the milk & white chocolate chunks.
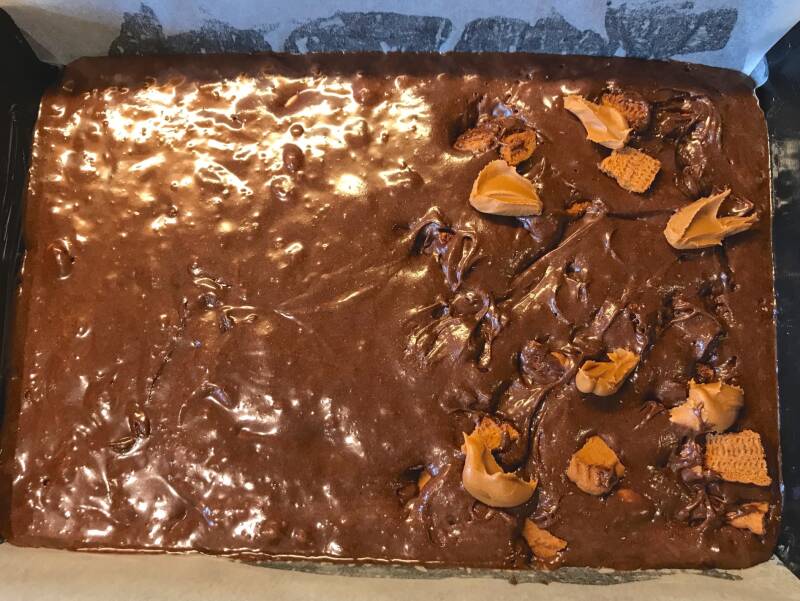
- Pour the mixture into your prepared tin and level out with a spatula.
- (Optional): at this point, I added some Biscoff biscuit chunks, and swirled some Biscoff spread through half of my brownie mix - read my blog post above for the verdict...
- Place your brownies in the preheated oven for 25 minutes.
- Give the tin a little shake, and if theres a wobble in the middle, place them back in the oven for 3-5 minutes. If not, take them out of the oven. They should have a nice shine to the top!
- Leave to cool almost completely in the tin before using the baking paper to lift them out onto a cooling rack. Then leave for another 5 minutes to cool completely.
- Using a sharp knife, cut the brownie into 12 equal portions (I like to measure to make sure they're uniform but it's not a necessary step).
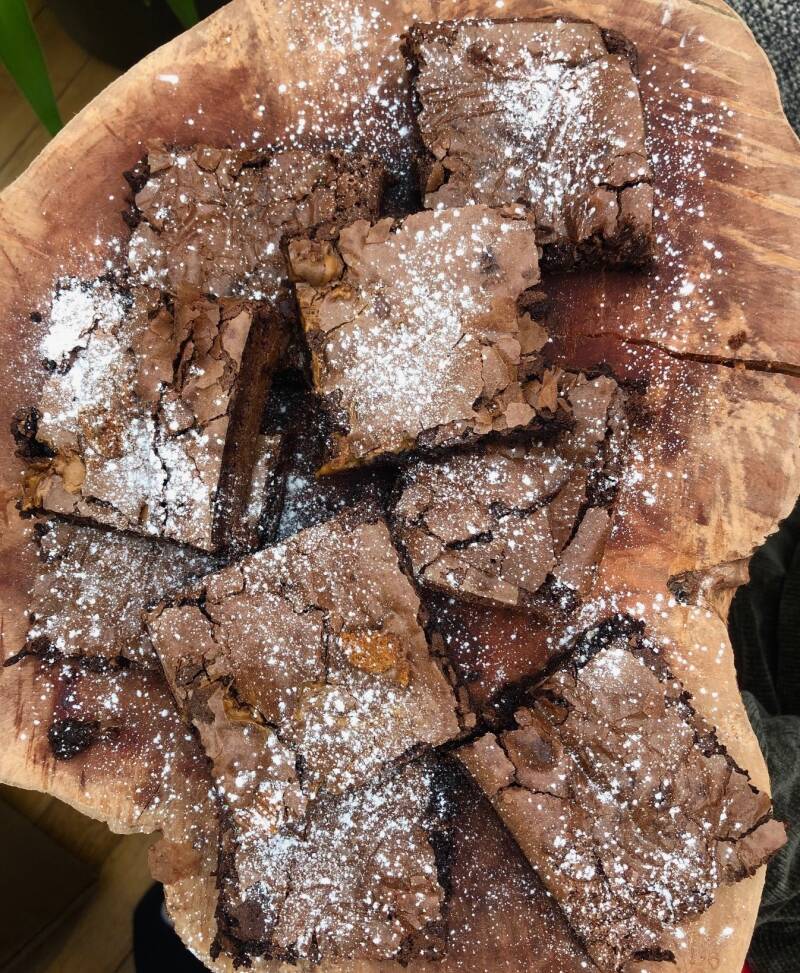
- Dust with icing sugar to serve.
Store in an airtight container and consume within 4 days.
ENJOY!


Tips & Tricks
Melting:
- Always use a low heat and melt slowly. Once your chocolate & butter is burnt you can't recover it, so its best to be on the safe side and be patient.
Folding:
- Folding is used to incorporate ingredients without knocking out air from your mixture.
- Follow a figure of 8 pattern to fold in your flour. Be patient and mix slowly. Use your spatula to scrape down the sides of the bowl to ensure you've incorporated all of the ingredients.
If anyone is struggling with measurements, check out my conversion charts - these are really handy for any recipe, so save or print them so you have them to hand for any tasty treat you bake.
Thank you so much for reading this blog post! Try this recipe out using the steps and photos to follow along. If you do, or if you try out any different flavour combinations, please send over a picture of the finished product and let me know how you adapted the recipe and how it tastes. Share this recipe with your family and friends, everyone will be able to adapt this recipe to create their perfect brownie!
Please leave a rating below, let me know if you found this recipe easy to follow, and ask any questions you might have - i'll get back to you! Leave any ideas in the comments for anything you'd like me to bake.
Please show some support on my social media accounts, and follow so you don't miss any new blog posts, recipes or extra content (you can also contact me easily on there!).
Until next time,
Abby x

Add comment
Comments