

The recipe for my 'Bake for your Neighbours' Simple Scones; a treat that any Brit loves! Why not follow my simple steps and make someone smile? This is an easy, basic recipe that you can adapt to create your idea of a 'perfect' scone.
First of all, a huge THANK YOU for the response on my first recipe! I was overwhelmed with the amount of visitors to my website, and was so happy when I discovered that some people had tried out the recipe for themselves. I can only hope this continues and you follow me on this journey, baking alongside me!
I think it's important for us all to keep ourselves busy at this time, and in my opinion, baking is the perfect new skill to learn. So, I hope that this simple recipe encourages people to give it a go - because anyone can do it! The idea behind this recipe is to bring some joy to people, and maybe make their day a little brighter during these difficult times, all while learning how to bake the perfect scones. Think about who might need a pick-me-up - if you know of any key workers, carers, NHS staff, vulnerable people or people living alone who are nearby - bake for them! Just be sure to follow all the government guidelines and wash your hands and surfaces regularly whilst you're baking.
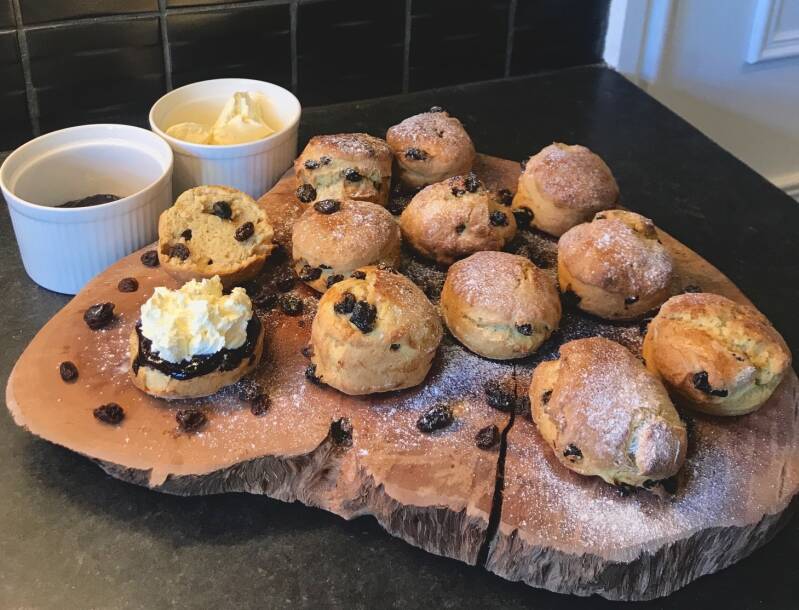
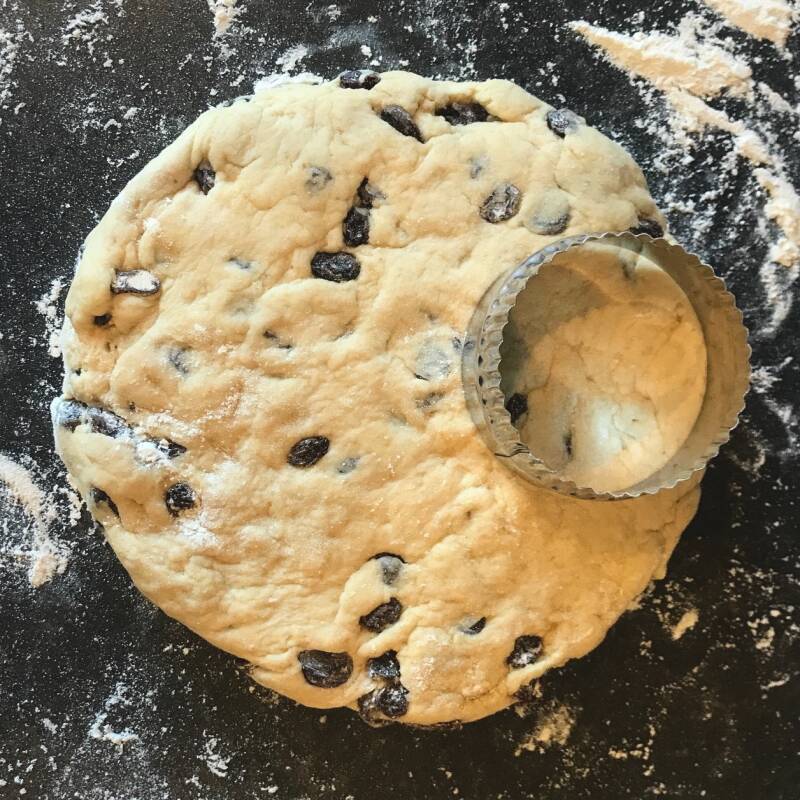
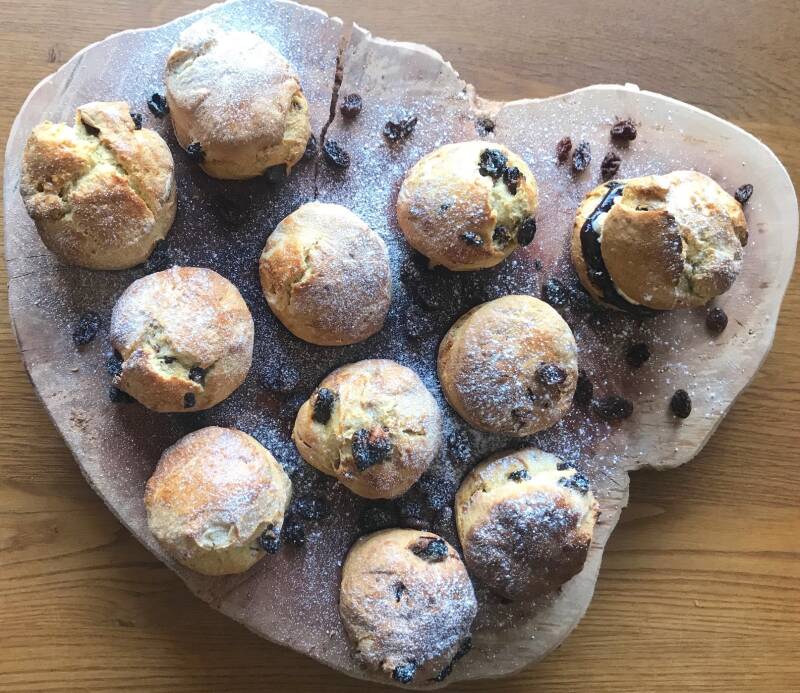
Scones are a staple - perfect in an afternoon with a cup of tea! The best thing about these scones is that they are so versatile! If raisins aren't your thing, add any other dried fruit, or get rid of the fruit completely and add other flavours like orange zest or cheese. This recipe makes 12 mini scones - for bigger scones, use a bigger cutter. I did this to begin with, but it meant I would only get 7 scones out of my dough (aside from this not being enough for my neighbours, it really bothered me that I would be left with an odd number...), so I folded the dough back together again, patted it down, and used a smaller cutter (6cm - this is clear in the 'you will need' section) which gave me 12 scones. This recipe is easily doubled or halved, so you can make as many as you desire!
Serve with whatever you like, but in this recipe, I advise that you to use jam and cream. You can use shop-bought jam or make some jam using the quick & easy recipe below with berries of your choice! I suggest eating these scones fresh from the oven, after 10 minutes or so to cool. Cut the scones in half and load both sides with jam, and top with cream...or cream then jam? I won't get into that debate! Then your tasty scones are ready to be delivered to your neighbours for an afternoon treat!
RECIPE
Ingredients:
This recipe makes 12 mini scones!
For the scones:
- 350g self-raising flour
- 1tsp baking powder
- 1/4tsp salt
- 85g unsalted butter (at room temperature)
- 3tbsp caster sugar
- 175ml milk (warm - heat in the microwave for 30 seconds)
- 1tsp vanilla extract
- 100g raisins (or any dried fruit of your choice)
- 1 egg


To serve:
- 300ml double cream (whipped)
- jam of your choice (shop bought or homemade)
TIP:
To make your own jam:
- Put your choice of berries into a pan and cover with water.
- Simmer for 20 minutes and then mash them up!
- Allow to cool for a couple of minutes, and then push through a seive to remove any seeds.
- Measure the amount of berries and add the same amount of sugar - together with the berries - to a fresh pan. Boil them gently until you get the desired consistency (cooking for longer will mean a thicker jam).
- Let the jam set and enjoy!
You will need:
- 2 baking trays
- baking paper
- cookie cutter (I used a round 6cm cutter)
- cooling rack
- electric hand whisk (or some serious elbow grease!)
Method:
- Preheat the oven to 220°C/200°C fan.
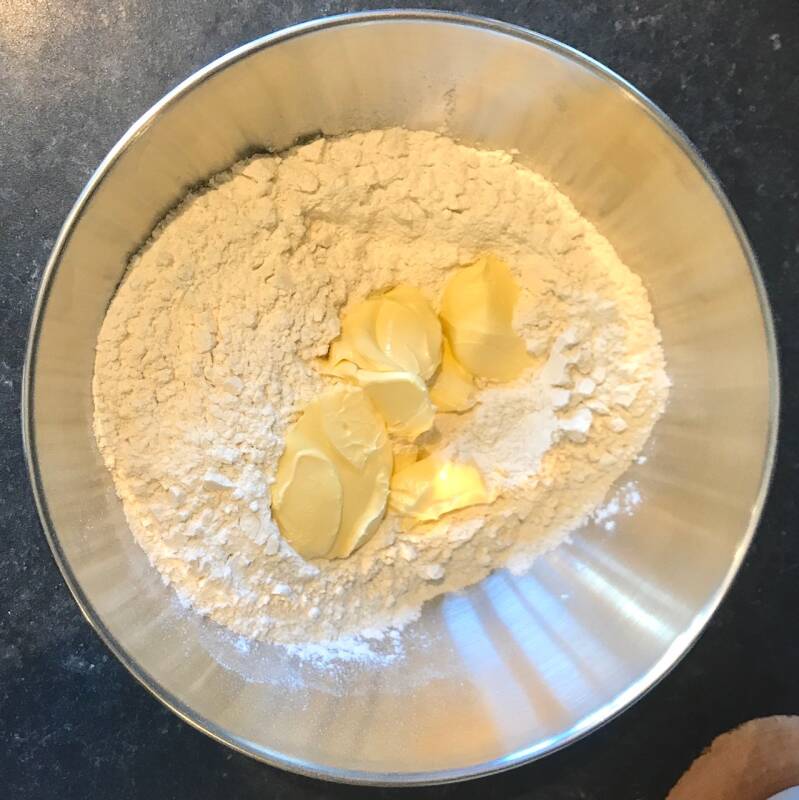
- In a large bowl, mix together the flour, salt and baking powder.
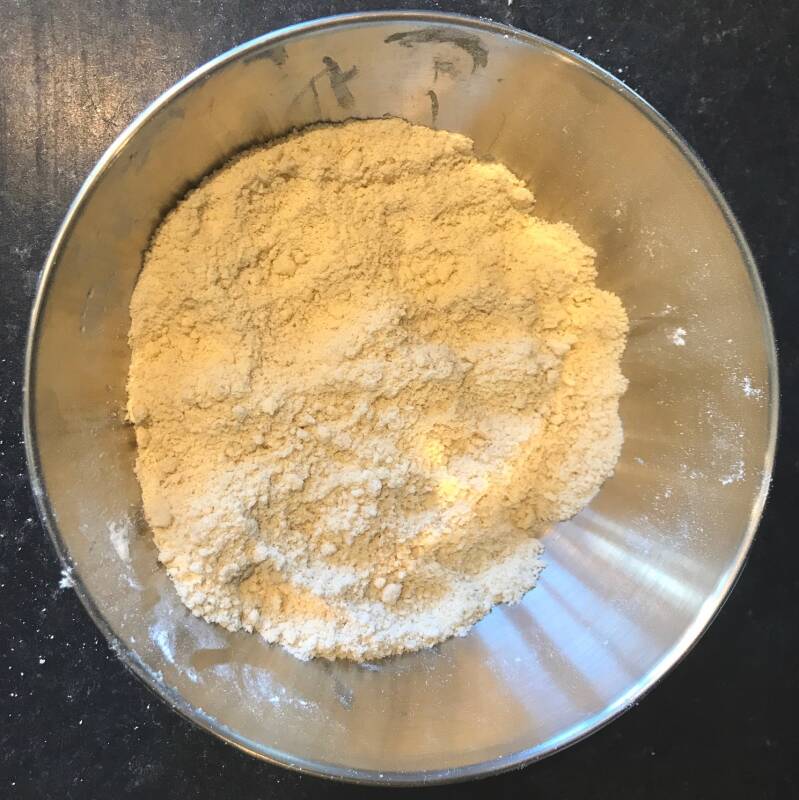
- Cube the butter and add it to the flour mix. Rub it in with the flour using your fingertips until it resembles breadcrumbs.
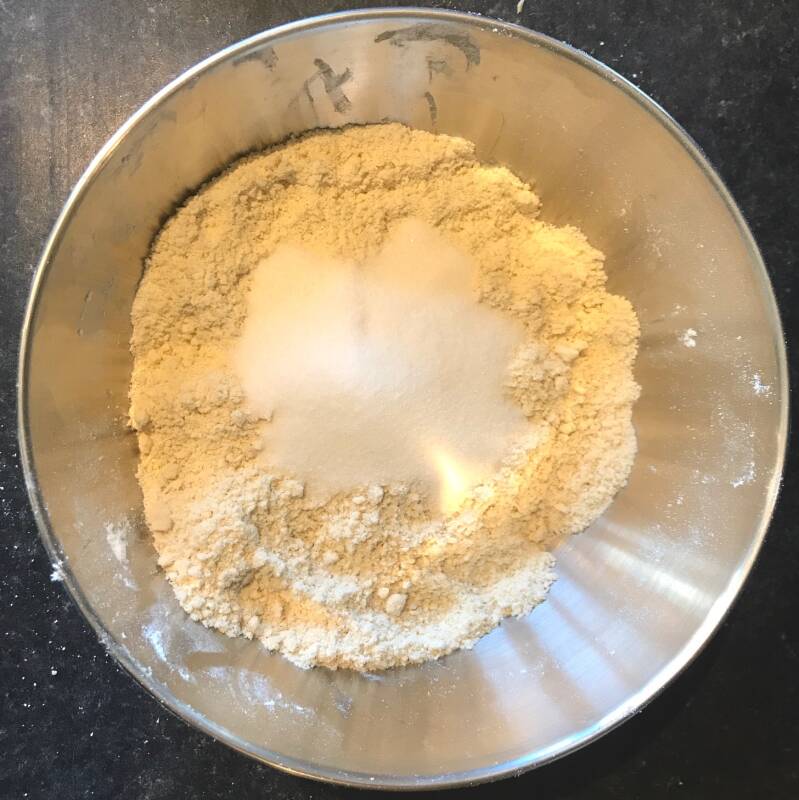
- Stir in the caster sugar.
- Heat the milk for 30 seconds in a microwave, add the vanilla extract and set aside.
- Put two baking trays in the oven to preheat.
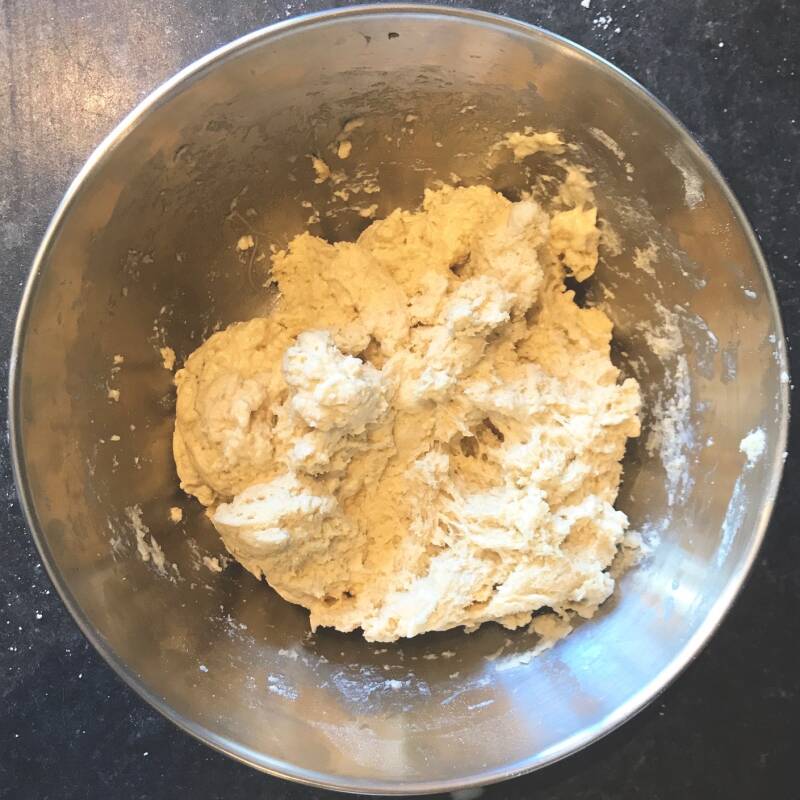
- Make a well in the centre of the dry ingredients. Pour the milk into the well and combine by cutting through the mixture using a blunt knife. The mixture should come together as a dough-like consistency.
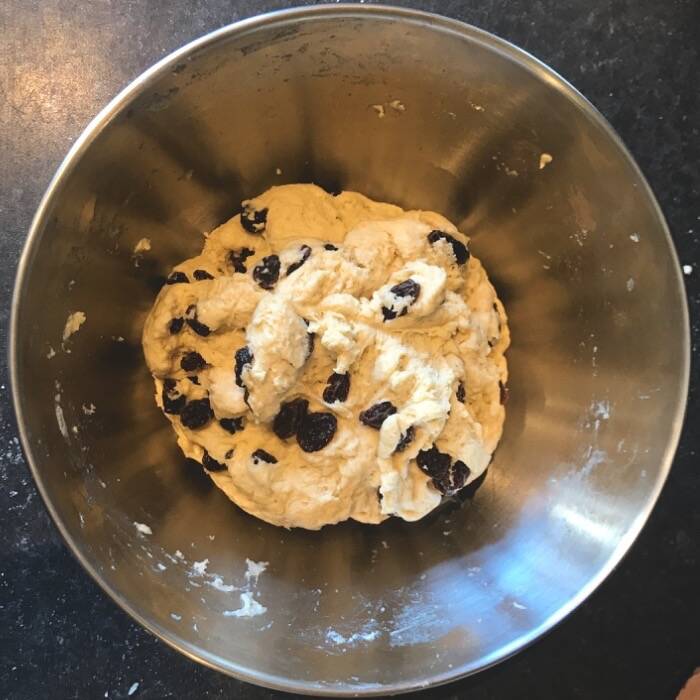
- Add the raisins (or your chosen dried fruit) and mix them through the dough, making sure they are evenly distributed.
- Dust a clean surface with some extra flour and tip the dough out. Fold the dough in on itself a couple of times to get a smoother consistency. Shape the dough into a flat circle about 2-3cm deep.
- Dip your cutter into some flour (I used a 6cm one but if you would like bigger scones, use a 7.5cm cutter. Just be aware you will have less scones!). Press the cutter into the dough and twist. Place each one on a floured surface. Repeat this step until you have all 12 scones! You will have to use the excess dough at least once - just bring the mixture back together, flatten it out, and start cutting again.
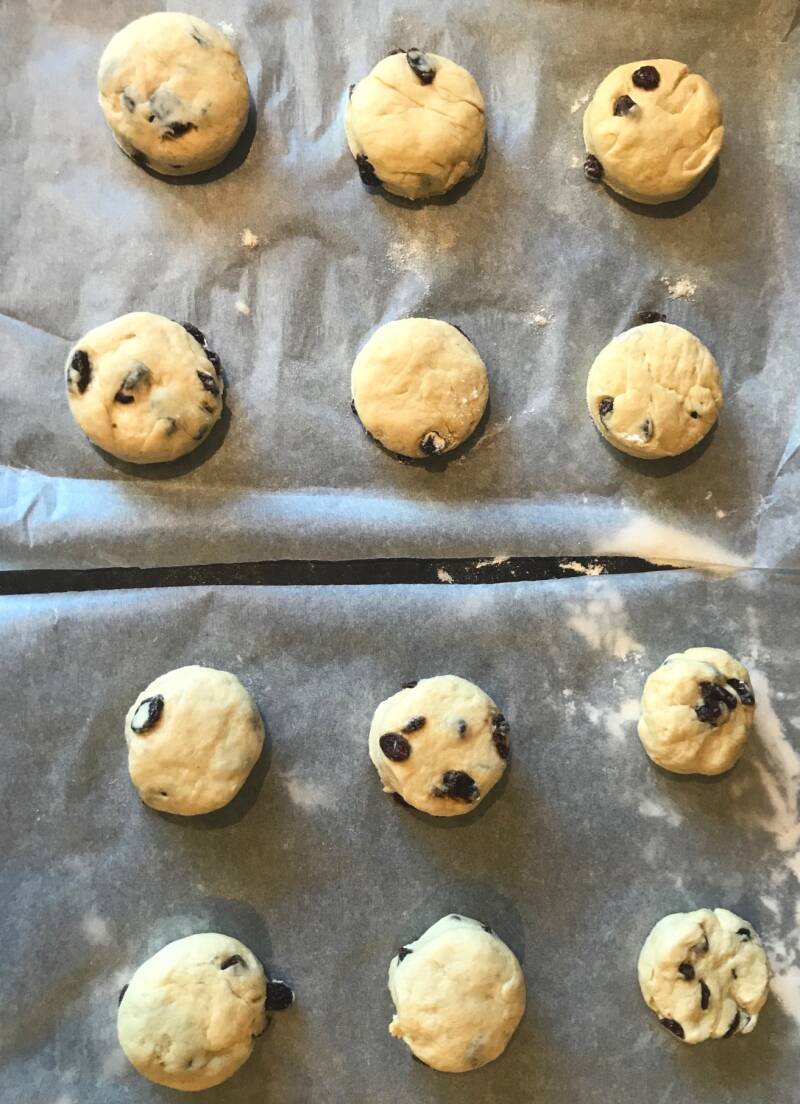
- Beat the egg and brush it across the top of the scones.
- Take the pre-heated baking trays out of the oven, place a sheet of baking paper on both, and space out 6 scones on each tray.
- Place in the oven for 12-15 minutes. Check after 12 minutes - they should have puffed-up and be golden brown on top! If they're not, place back in the oven for a couple of minutes.
- Take the scones out of the oven and transfer to a cooling rack.
- Pour the cream into a mixing bowl. Using an electric hand whisk, whip up the double cream until it becomes stiff (when it's almost there - mix slowly! Be careful not to over-whisk.
- Cut the scones in half and serve with jam and cream - maybe even add a dusting of icing sugar! To see how to make your own jam check out my 'tip' in the ingredients section.
These are best served warm just out of the oven, but they will keep for 1-2 days in an airtight container.
Once cool, they can be frozen for up to 2 months - just ensure they are tightly wrapped.
I'll let you decide the rest...jam or cream first???
ENJOY!

If anyone is struggling with measurements, check out my conversion charts - these are really handy for any recipe, so save or print them so you have them to hand for any tasty treat you bake.
Thank you so much for reading this blog post! Follow my simple steps and try it out - make somebody smile! If you do, please send over a picture of the finished product and let me know how it tastes! Share this recipe with your family and friends because - really - anyone can do it!
Please leave a rating below, let me know if you found this recipe easy to follow, and ask any questions you might have - i'll get back to you! Suggestions for other recipes are also welcome.
Give my social media accounts a follow so you don't miss any new blog posts, recipes or extra content (you can also contact me easily on there!).
Until next time,
Abby x

Add comment
Comments