


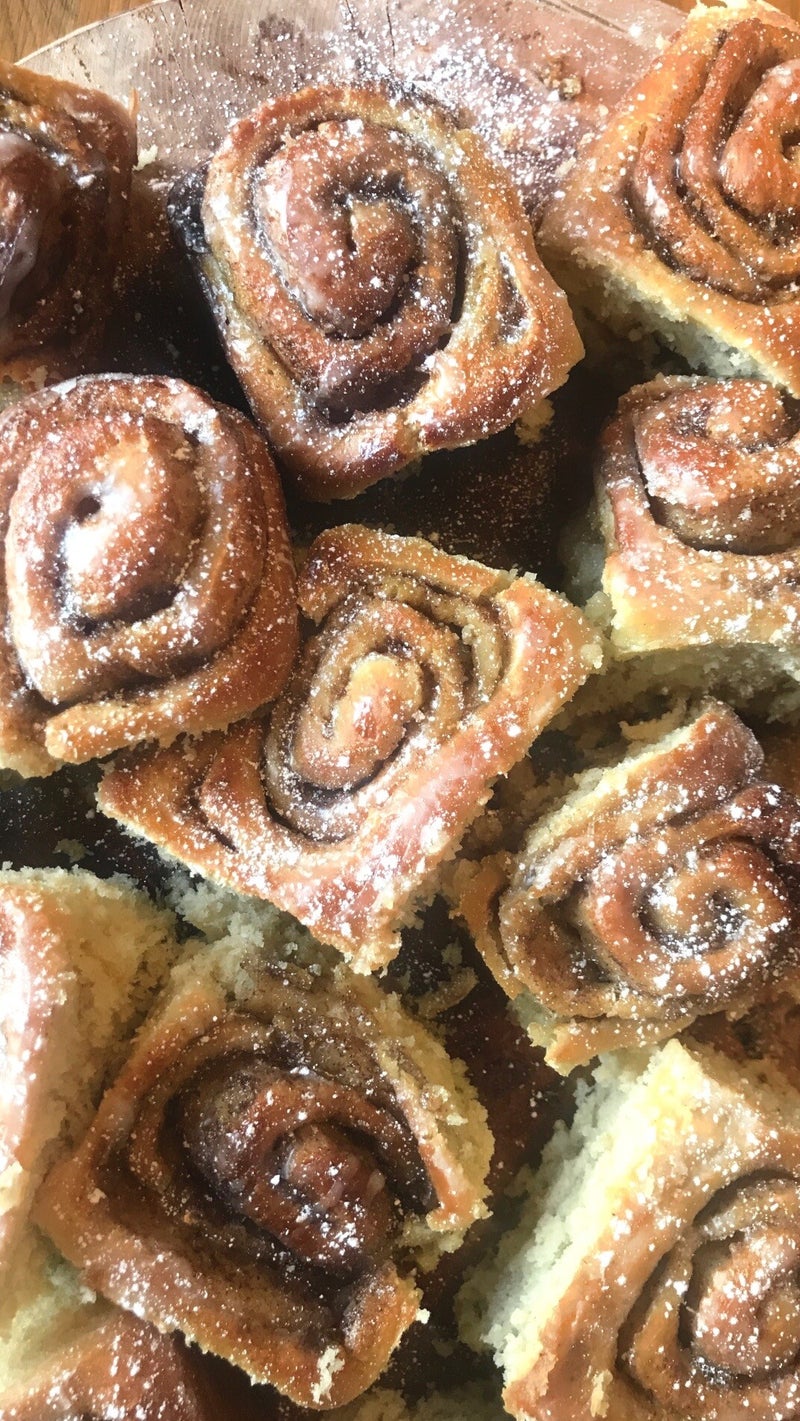
The recipe for my Cinnamon Buns - a sweet dough with a sticky cinnamon filling and sugar glaze! A share-and-tear treat that tastes great with a hot coffee.
I love these cinnamon buns!!! I cant get enough of bread and I love sweet things, so this is the perfect combination for me! The great thing about this recipe is it can be adapted in so many different ways - the possibilities this recipe will give you are endless. This recipe is for classic cinnamon buns, using my sweet dough recipe - which will definitely be repeated on my blog in the future! This sweet dough recipe is also easily halved or double, so bake as much or as little as you like. And like I said, the possibilities are endless; you can play around with the flavour of the dough - maybe add spices or run some dried fruit through it - or you can change the shape - make individual knots or plait the dough to create a large tear and share - or you can even add to or change the flavour of the filling (I will definitely be trying this recipe with chopped apple in the filling!). My main aim is to inspire other people to pick up that whisk and bake, so it's recipes like these that I think are a staple for my blog. If you don't like cinnamon, don't use it! You can follow the recipe exactly, just substitute the cinnamon for ginger, or chocolate, or whatever flavours you love! This recipe makes roughly 20 small cinnamon buns. You can alter this and make bigger ones if you like - instead of rolling from a long edge, roll from a short edge and place further apart in the tray before the second prove (they will spread more).
If you want these cinnamon buns made fresh but don't have time to go through the whole process, make them the day before! For the second prove, place cling film over the tray and place the cinnamon buns in the fridge over night. The next day, just brush with the beaten egg before placing in the pre-heated oven. You can even make the glaze the day before (as long as you tightly cover with cling film and place in the fridge) and then you will have your cinnamon buns ready in less than half an hour - you just have to forget about all the work you put in the day before! But remember - it's worth it!
I hope this recipe will introduce a new skill for most people, whether that be working with yeast, kneading, or knowing the best environment for your dough to prove. You'll find some useful tips and tricks on all of these methods underneath the recipe for these cinnamon buns, including a step-by-step guide to kneading by hand. They will be super helpful for any bread recipe I post, so feel free to make a note or print them out to use in the future.
One idea I had - after the first prove, split the dough in two. With one piece, fold the dough in on itself, wrap with cling film and place in the freezer. When you've tried out this recipe for cinnamon buns, use the rest of the dough to try again, but change an element - try a different shape or alter the flavours! Hopefully this will give you a challenge. Let me know if you would like any tutorials for different shapes like plaits and knots - visit the contact page to find my socials and email!
RECIPE
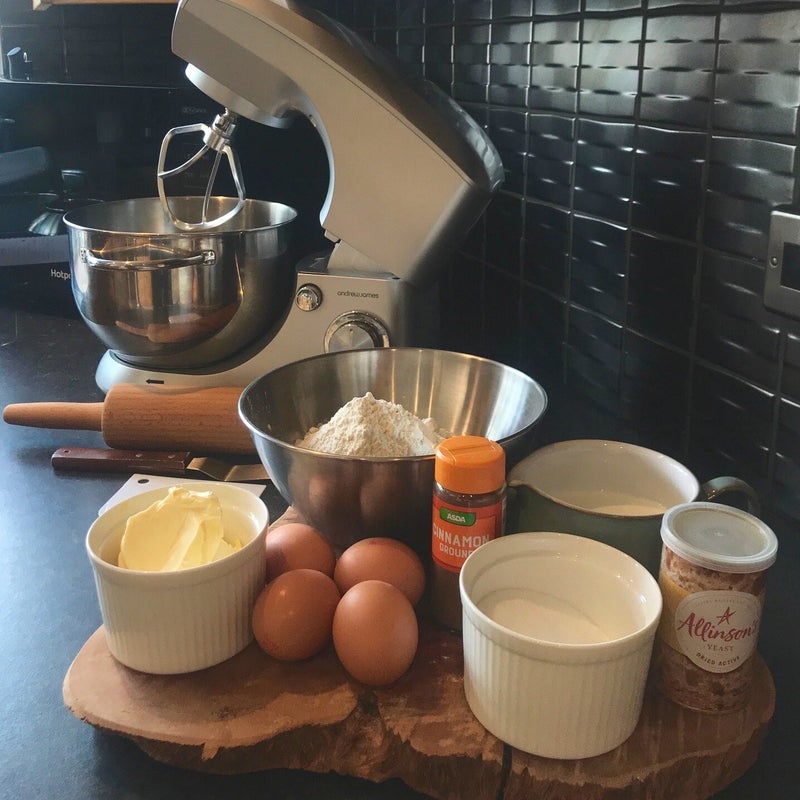
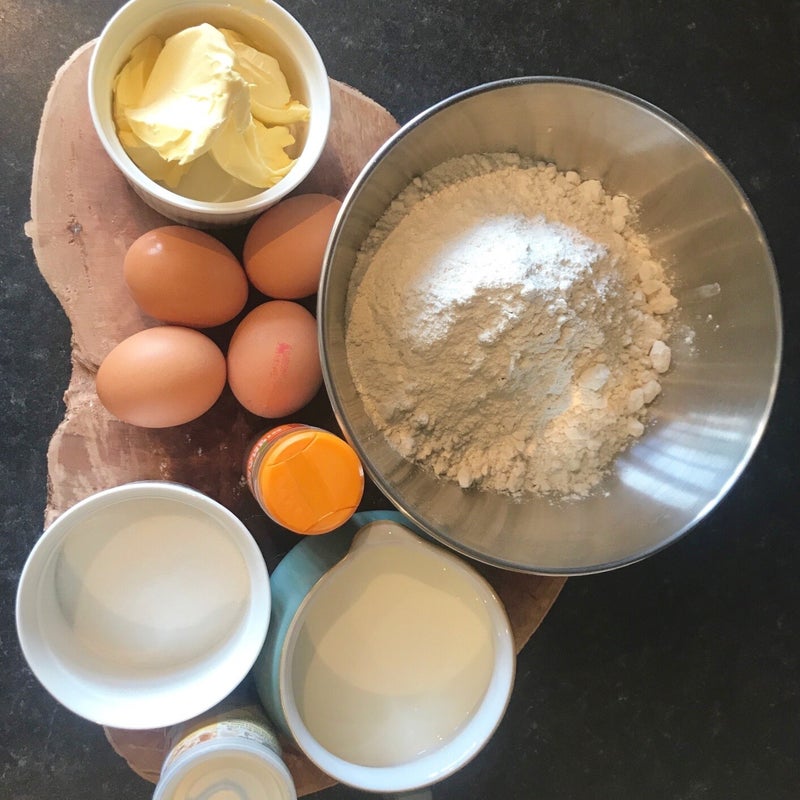
Ingredients:
This recipe makes 20 small cinnamon buns.
For the sweet dough:
- 240ml milk (warm)
- 100g caster sugar
- 4tsp active dried yeast
- 520g plain flour
- 3 eggs (one for egg wash)
- 1tsp salt
- 110g unsalted butter (softened)
For the filling:
- 100g brown sugar
- 50g caster sugar
- 2-3tbsp cinnamon (personal preference)
- 60g unsalted butter
For the glaze:
- 2-3tbsp water
- 75g icing sugar
You will need:
- deep 8"x12" baking tray
- rolling pin
Method:
Dough:
- Stir together the sugar and warm milk in the bowl of a stand mixer, or a large mixing bowl if you're working by hand. Sprinkle the yeast over the top and leave to activate for around 5 minutes. The mix should froth slightly. Give it a stir to ensure all the yeast has been incorporated.
- Once the yeast has been activated, add the rest of the sugar, 1/4 of the flour (130g) and stir to combine.
- Add 2 eggs and the salt, making sure all the ingredients are combined.
- Stand mixer: Using the paddle attachment, mix on low speed whilst gradually adding the flour (you may need to scrape down the sides of the bowl in between additions. By hand: Use a wooden spoon to mix in the rest of the flour (this may take a while but be patient!).
- Stand mixer: increase the speed to medium, and add the softened butter 1 tablespoon at a time. Then beat for an additional 4 minutes until the dough comes away from the sides of the bowl and is smooth, slightly sticky, and stretchy. By hand: Incorporate the butter into the dough using a wooden spoon (again, this may take a while - but it's worth it!). Then knead the dough on a floured surface for 8-10 minutes until the dough is smooth, slightly sticky and stretchy. For a how-to on kneading, check out my 'tips & tricks' section below.
- Lightly grease a large bowl and place the dough inside. Cover with cling film and leave in a warm spot to prove for 1.5-2 hours.
- Filling: Whilst the dough is proving, stir together both sugars and cinnamon into a bowl.
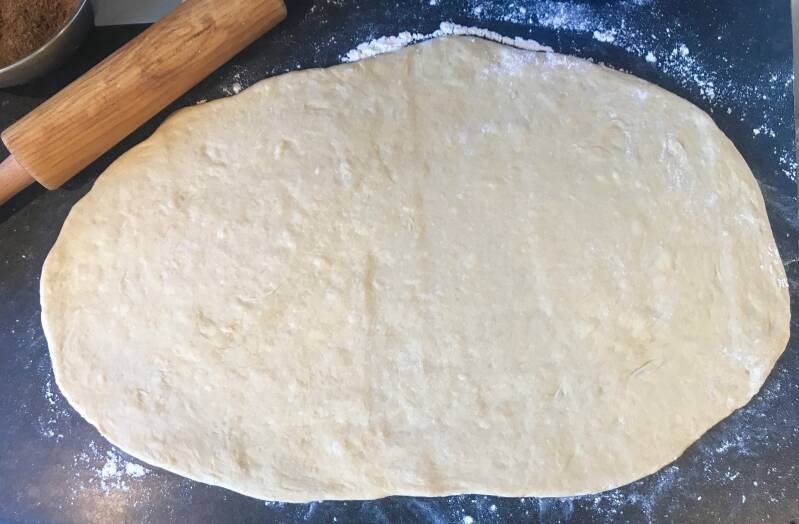
- After proving, the dough should have roughly doubled in size and be light and airy - if not, leave it a little while longer. When your dough is ready, place on a floured surface and roll it out into a 14"x24" rectangle.
- Filling: Melt the butter until just softened, and mix to achieve a paste.
- Spread the butter over the rolled out dough. Sprinkle the cinnamon and sugar mix evenly over the top of the buttered dough.
- Starting from a long edge, tightly roll the dough all the way to the opposite edge. Pinch the edge of the dough together with the roll to seal the dough. You should be left with one long roll of dough (see step-by-step photos for help!).
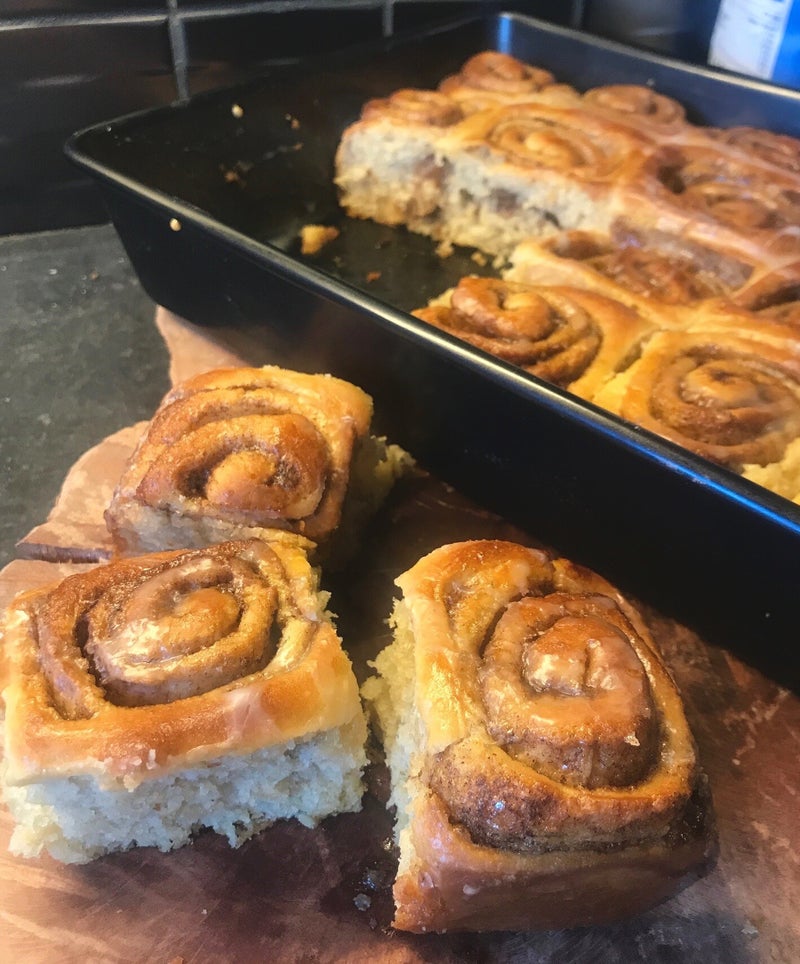
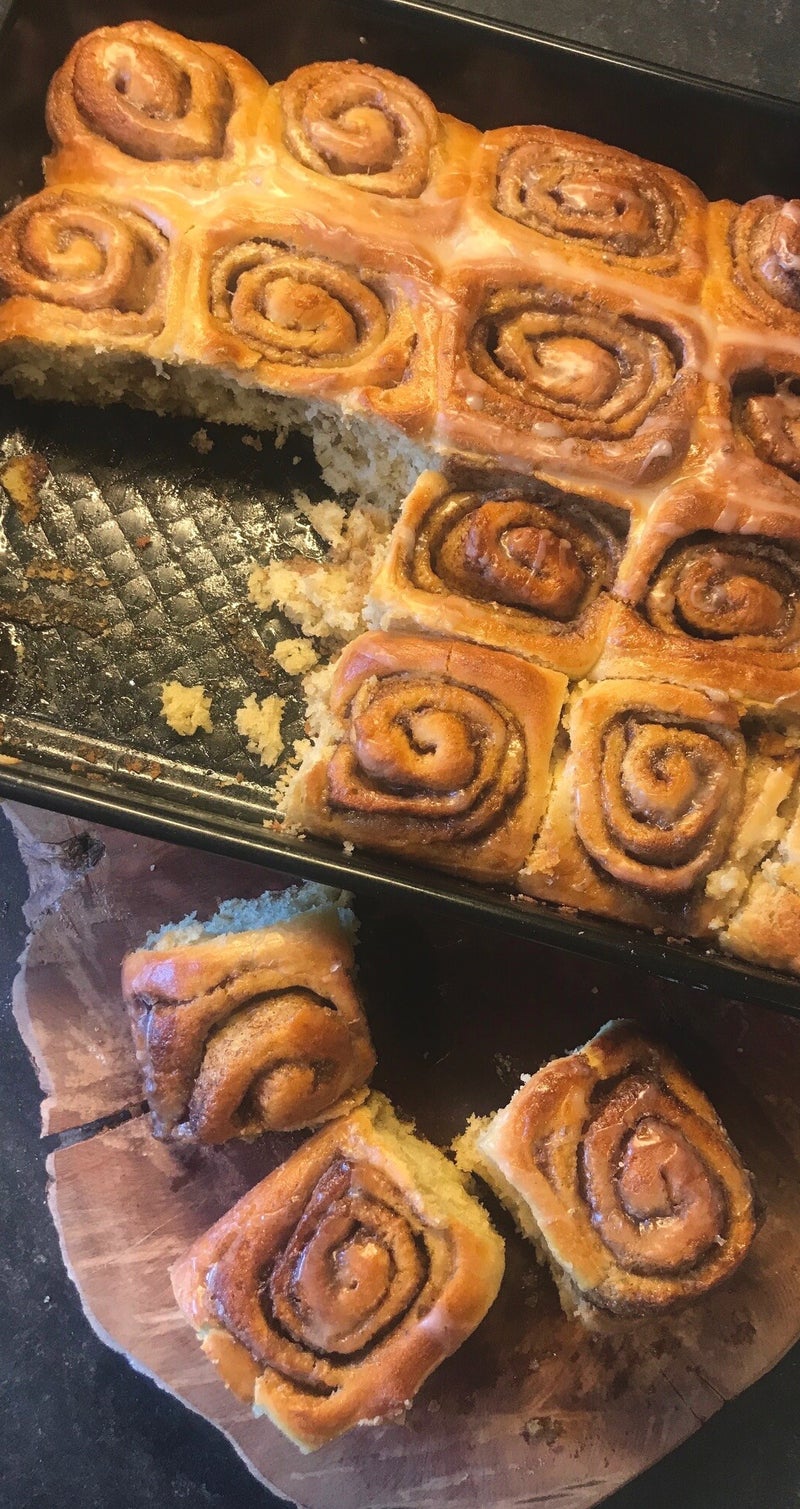
- Slice the roll every 1.5". You should be left with about 20 buns. Place them swirl-side-up in a well-greased 8"x12" deep baking tray, leaving a little space in between each one for a second prove (see step-by-step photos for help!).
- Cover with cling film and place in a warm spot for 1 hour. The cinnamon buns should have risen and merged together slightly (see photos).
- When you have 20 minutes left on the clock for the second prove, preheat your oven to 180°C/160°C Fan.
- Beat the remaining egg and brush over the top of the cinnamon buns before placing in the preheated oven for 22-25 minutes. They should be nice and golden on top. Take the cinnamon buns out of the oven.
- Glaze: Whilst the cinnamon buns are cooling slightly, prepare the glaze. Mix together the water and icing sugar until smooth - add more or less icing sugar to get your desired consistency (more icing sugar=thicker glaze).
- Pour the glaze all over your cinnamon buns.
I recommend eating your cinnamon buns warm. Eat them straight out of the oven, or, for best taste and texture, once cool place in the microwave for 15-20 seconds before eating!
To store, either leave in the baking tray covered with cling film, or cut into individual buns and keep in an airtight container at room temperature. They should last for up to 3 days.
P.S. your kitchen should smell like a bakery!
ENJOY!
Step-By-Step Rolling Process


Tips & Tricks
Yeast:
- To activate the yeast, the liquid should be warm, but not hot - too hot and it will kill the yeast.
- After leaving to activate for 5 minutes, the mixture should be frothy, if not, your best bet is to tip it out and start again!
Kneading:
- Kneading develops the gluten and allows the dough to become stretchy and smooth. Without kneading, your dough will not rise whilst proving.
- To knead by hand: On a floured surface, push the dough away from you with one hand, whilst pulling towards you with the other (don't push/pull enough to tear the dough though!). Bring the dough back together and repeat this action for 10 minutes. The dough will be properly kneaded when your hands are free from dough!
Proving:
- Make sure that once the dough is kneaded, it is still a little sticky. If the dough is dry or coated in flour, it will not rise properly during the proving period.
- Without using an excess amount of oil, ensure the bowl is well greased all over so the dough does not stick.
- Cover tightly with cling film.
- The dough will rise best in a warm environment.

If anyone is struggling with measurements, check out my conversion charts - these are really handy for any recipe, so save or print them so you have them to hand for any tasty treat you bake.
Thank you so much for reading this blog post! Try this recipe out using the steps and photos to follow along. If you do, or if you try different shapes and flavours, please send over a picture of the finished product and let me know what you changed and how it tastes! Share this recipe with your family and friends, everyone will be able to alter this recipe slightly to achieve a treat they'll love, all whilst learning some key skills for baking.
Please leave a rating below, let me know if you found this recipe easy to follow, and ask any questions you might have - i'll get back to you! Suggestions for other recipes are also welcome.
Please show some support on my social media accounts, and follow so you don't miss any new blog posts, recipes or extra content (you can also contact me easily on there!).
Until next time,
Abby x
Add comment
Comments